Account History
School Lunch keeps a running history of all meal and deposit transactions and changes to an account (such as pay status, teacher, etc.) This is done for safety purposes. Meal history posting takes place after the deposit and daily meal reports have been printed.

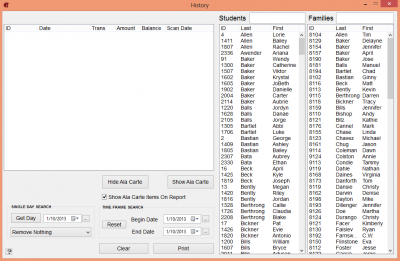
Access the history portion of the program by selecting HISTORY from the REPORTS menu or click the HISTORY button in the Command Center. When the HISTORY window appears, find the student name (or family, if you wish to look at a family history) you wish to view in the scrolling list to the right and double-click. You may use the text box above the STUDENT and FAMILY list boxes to type in a list name, to help narrow down your results.
The most recent history will display at the end of the list. If all of the history is not visible, use the scroll bar on the right side of the list to access any non-visible history.
The first two columns show the ID number, along with the date and time of the transaction. The date column is an extended date broken down by year/month/day/hour/minute. The next three columns show the transaction type, the dollar amount involved in the transaction and the account balance total after the transaction. The last column shows the scan date for meals. The extended date concept is used to help sort records where there was more than one entry per day. This way breakfast is sorted before lunch, and deposits are sorted when they are posted.
There is an exception to the rule of sorting and that is when there are multiple transactions per report period. In the case of multiple transactions per report, it is possible that the two transactions are sorted out of sequence and the balance figures will appear out of order. Because both the transactions were posted in the same minute, it is confusing which to sort first. If the sorting doesn't happen in the correct order then our balances seem out of order.
History Options
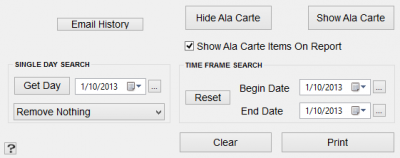
 You can choose to show Ala Carte items that were purchased in a transaction by clicking on the SHOW ALA CARTE button. This will expand the transaction to show the Ala Carte items purchased. You can click the HIDE ALA CARTE button to collapse the specific Ala Carte items that were purchased.
The history information may be printed by clicking the PRINT button in the HISTORY window. As you advance further in the year, histories will become very long. You may only want to send or print a portion of the history. In this case, you can use the TIME FRAME SEARCH to select a period of time you would like to print a student history report for. (When both days are the same, all history is viewed.) After selecting the time frame, click on the student or family you wish to view.
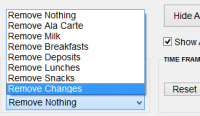
Also in the HISTORY window is a dropdown list, where you can choose to remove items from the printed report. Removing an item from the history will not change the history or modify it in any way. You're simply hiding if from view. In the example below, we are choosing to REMOVE CHANGES (track changes, teacher changes, etc.) from the printed history:

If there is an email entered in the student or family account corresponding with the history, you will see a EMAIL HISTORY button. You can send a copy of the history to the entered email address by pressing the EMAIL HISTORY button. If the email was sent successfully, a message box will appear notifying you that the email was sent. The larger the school, the more time it takes to post the history at the end of the report printing process.
The CLEAR button clears the screen. You can then start searching for another student or family history. The “Show Ala Carte Items on Report” check box will print the á la carte items under the corresponding transaction on the report or in the email if selected.
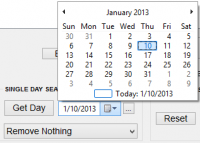
You can also use the SINGLE DAY SEARCH if you would like to look at the School Lunch transaction history for one particular day. Simply click on the calendar icon and select the date you wish to locate. Click on it. The date should appear in the text box field to the left. Click GET DATE, and the history for that specific date will appear in the list box above:
