Application Tracker
New to School Lunch 2015, Application Tracker gives you the ability to track free and reduced applications for students in your school. Free and reduced applications and status changes are tracked much like other history in School Lunch except it is in it's own section. It is basically separated in to two parts which will be explained below.
Data Entry
Tracking information is kept on a student-by-student basis and does not apply to a family account. Although in almost every case application information is the same for each student in a family, application statistics need to be entered for each each child separately.
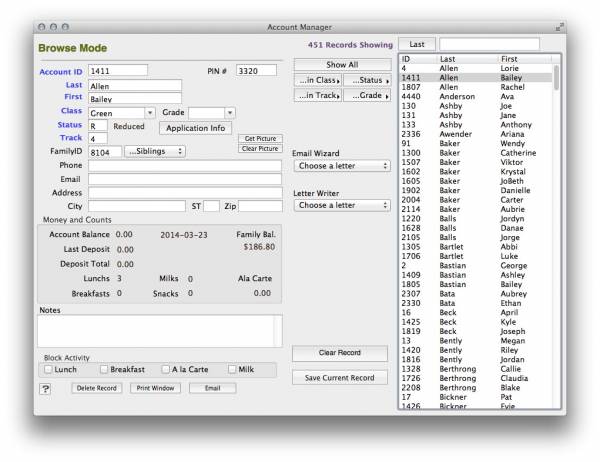
Assigning application information to an account is accomplished from the ACCOUNT MANAGER window. First retrieve an account to work with by double-clicking the name in the list on the right.
If tracking has not been initiated for this student the button will read APPLICATION INFO. If tracking has been in initiated, the button will contain the date of the most recent entry for that student.

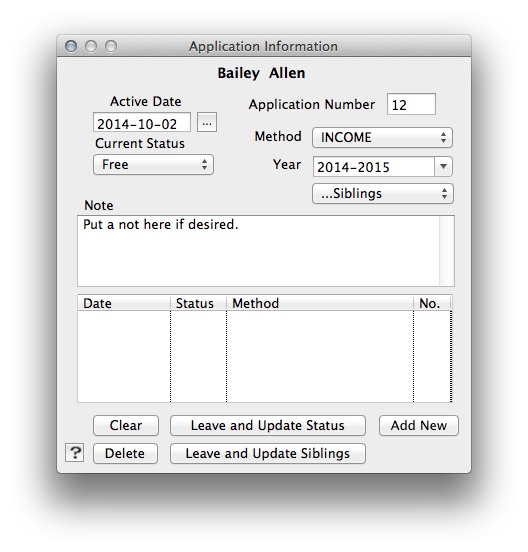
Pressing the APPLICATION INFO (or date) button will open the APPLICATION INFO window. This is where you enter all the details needed to track an application. Although specific details are not kept in School Lunch, such as income level, members in the family etc., we are a able to track the date of initial application or change, an application number (optional), method of free or reduced approval, the school year you are tracking and the status as of the entered date. In addition to Free and Reduced, X-Enrolled is one of the options. X-Enrolled is used when a student ceases to qualify for free or reduced meals. Their status must be changed to one of the full pay categories manually in the ACCOUNT MANAGER. If a child is no longer at your school, you may assign them the status of “X” as a place holder. They still are on the list but they are not counted in either in any other status designations. This allows you to maintain application tracking for moved students which will make more sense when we look at the Application Stat section below.
Below is a sample of how the fields and selectors are to read. Be sure to use the date selectors for entering dates as this will provide accurate retrieval of application data for audit purposes.
Method is by Income, DC or Categorically.
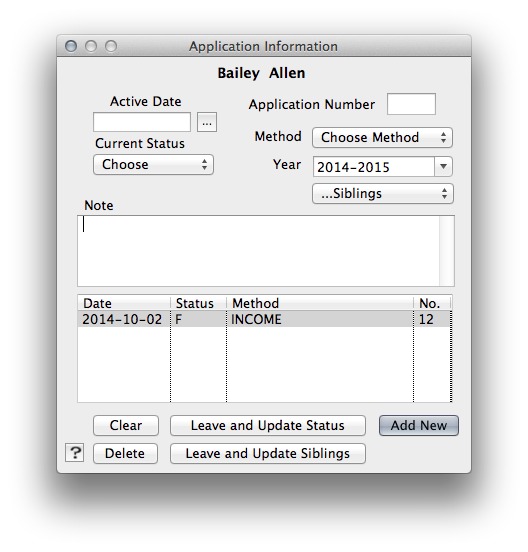
When the information has been entered properly, press the ADD NEW button and the saved entry will appear on the list in the middle.
Historical entries are in chronological order and the first entry on the list is considered to be the initial application for the year. Any additional entries are considered changes and usually reflect a change in status during the year.
The …SIBLINGS button lists other members in the same family. You can toggle between members by selecting the member you which to view from the pull down menu.
The LEAVE AND UPDATE STATUS button will automatically update the student status in the ACCOUNT MANAGER and close the APPLICATION INFORMATION window. Clicking on the close window button at the top of the window will not update the status in the ACCOUNT MANAGER.
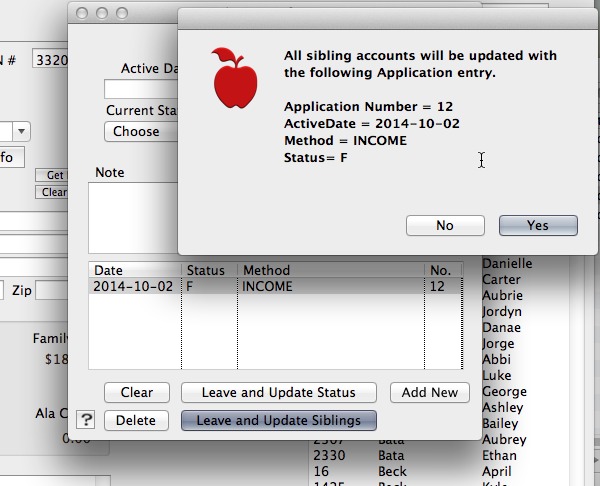
If you wish to apply the same application information to other family members, click the LEAVE AND UPDATE SIBLINGS button. This will apply changes to all members linked to a family.
To make changes to an entry, click on the entry from the list and the fields above will populate at which time changes can be made and resave. You must choose to LEAVE AND UPDATE SIBLINGS to apply changes to other members of the family.
Only use the LEAVE AND UPDATE SIBLINGS button when adding a new historical entry (like an initial entry or a change in status during the year). Retrieving an existing entry and making a change will require that all siblings be changed individually. This is best accomplished by making one change and using the toggle button to choose other members of the family and make changes accordingly.
If you see more entries on the history list than are correct, double-click on the entry in error to load the fields above and click the DELETE RECORD button to remove it from the list. Again, each family member must be handled on an individual basis.
While most students will only have one entry, some will show two or more if income status changed during the year due to employment changes etc.
In addition to the date showing on the APPLICATION INFO button, the is another way to easily see who has tracked information attached to their account and who does not.
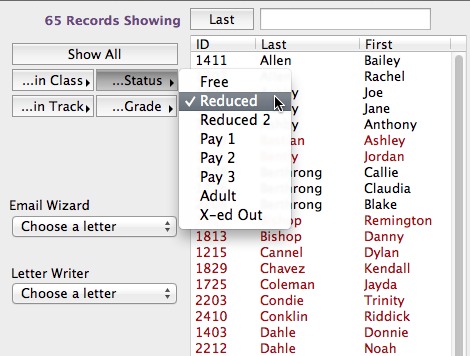
Using the Status selector from the ACCOUNT MANAGER window you can easily see that entries shown in red are lacking any application tracking information. The accounts that show in black have historical information recored that corresponds with their account. Double-click on a name in black and the APPLICATION INFO button will show the date of the last posted information.
Application Stats
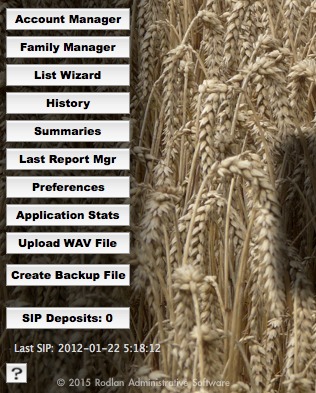
Clicking the Application Stats button from the main window will pull up reporting options for APPLICATION TRACKING.
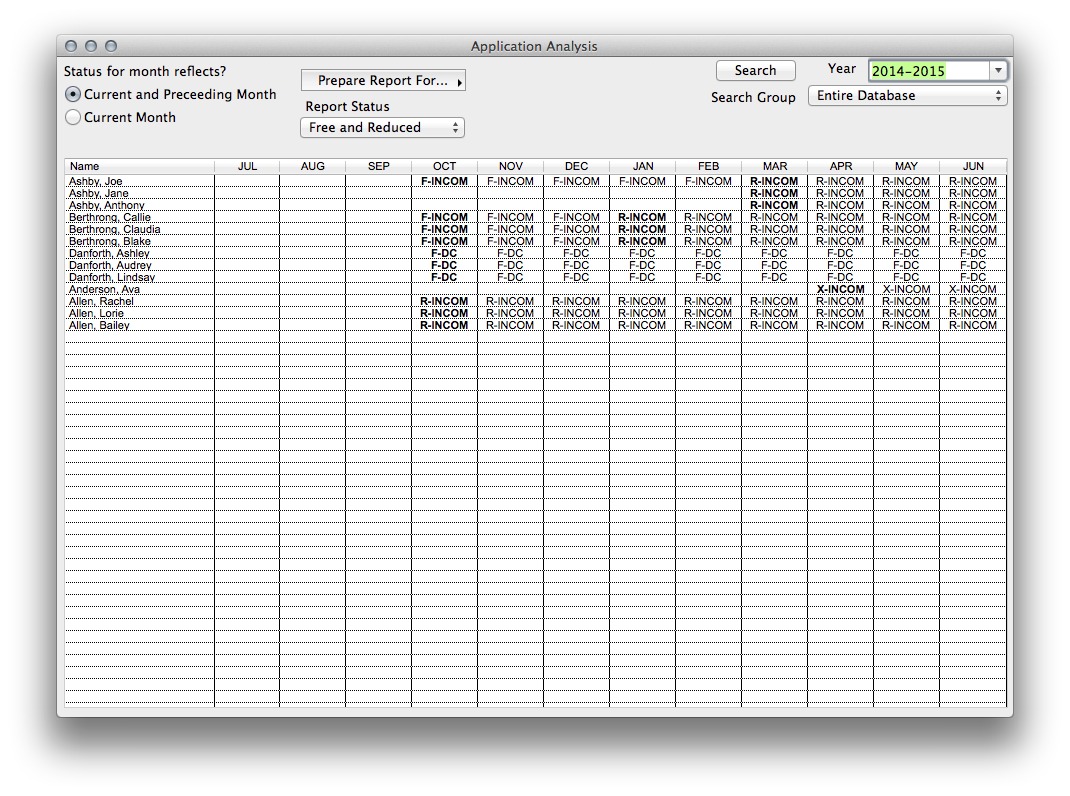
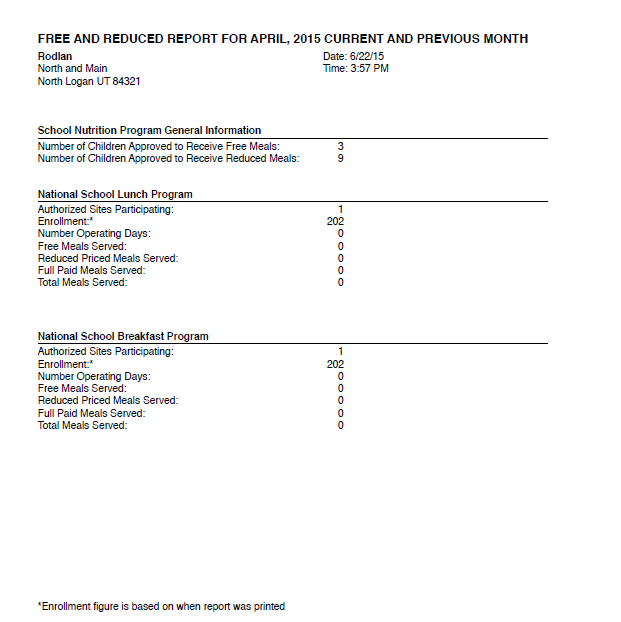
Application analysis pulls information from two areas to create information in a meaningful way. We have tailored information to reflect data entry on state websites for reporting meal statistics on a monthly basis.
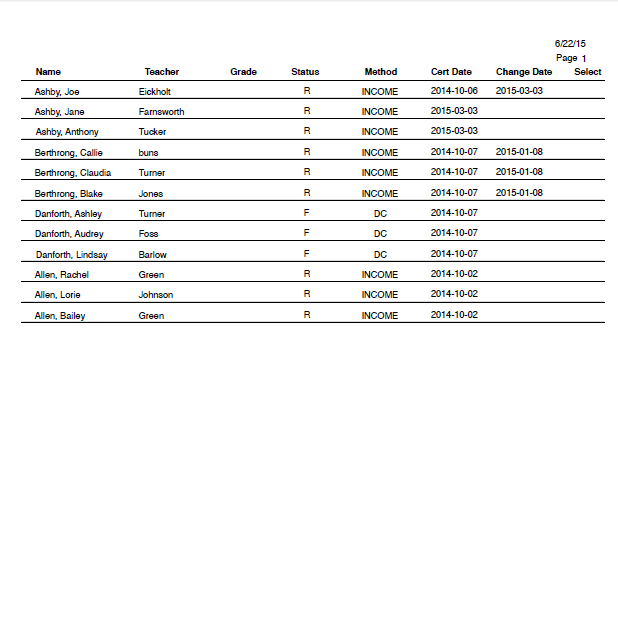
The large list on the lower portion of the window shows all student that we are tracking. The month columns show change information for each student, free or reduced and which method. Bold entries reflect a change in status for that month.
Reports can be printed for free, reduced or free and reduced on the same report. We have had feedback that requests that when a status changes in the month, that each status be counted reflecting the change. Others want the status to be reflect for the current month regardless of when the change was made. For this reason you can choose to show current and proceeding month or current month only. Probably the best way to see how this works is to give it a try and look over the reports.
Choose what status options you would like to see on the report and then choose a month to view from the PREPARE REPORT FOR… button.
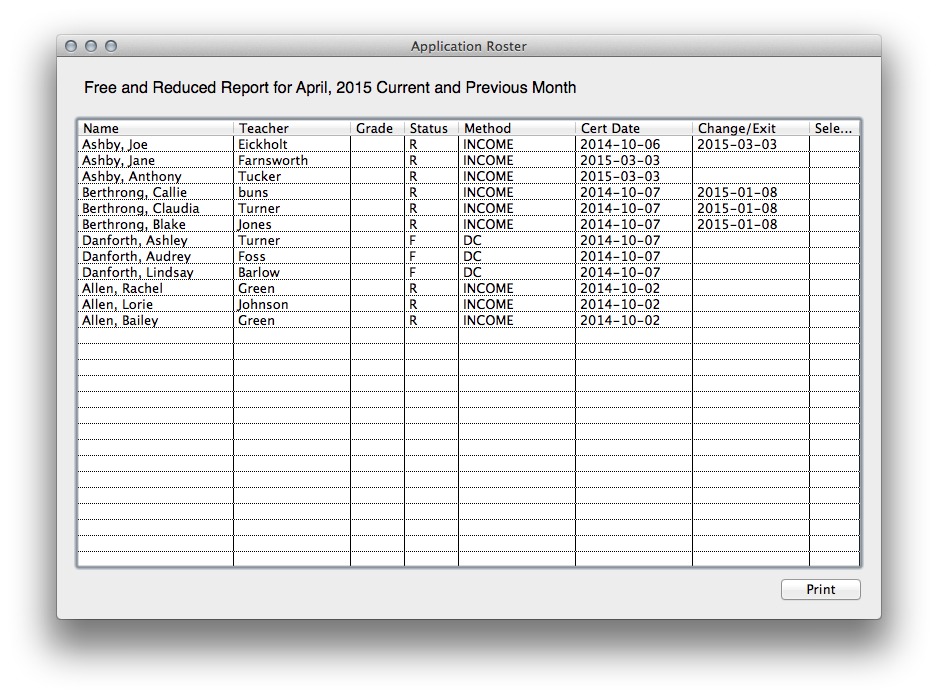
This window shows a preview of the student entries as they will appear on the printed report. The names that show is a historical list of the month selected for preview. This doesn't reflect the current status but exactly how things were in the selected month.
The following two pages are PDF samples from the printed report. Our example shows the print out of the preview page and a page that shows the enrollments from the month selected. Information for static page pulls information from the monthly summaries of the same month. This print is a poor example as we do not have data to reflect daily meal reports for the month of April. Your real life examples will be much more meaningful.
Looking at past months is perfect for auditors where looking at current months is a great way to extract possibly more meaningful information for reimbursement reporting.
To view a tutorial video on Application tracking visit:
Part A: https://www.youtube.com/watch?feature=player_embedded&v=2sBFpBNnVDI
Part B: https://www.youtube.com/watch?feature=player_embedded&v=nM_JG1n3FaQ
