Photo Size & Send
Photo Size and Send lets you to select a folder that contains all the photos you wish to edit pull them in to a size and placement picture box, and link them to an account name. Once the photo has been properly sized, you will be able to send it directly to the student account without entering the account manager.
This will make the adding photos easier for schools that do not have photographers that are able to provide photos in the required format for direct photo importing. If the photos are of similar size and placement, Photo Size and Send will remember the previous setting when importing a new picture making the process even faster.
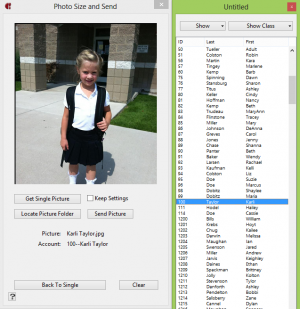
The easiest way to use Photo Size and Send, is to place all your photos you want to work with in a common folder. Open the Size and Send window which is found under the Utilities Menu.
Photo Size and Send is comprised of two parts:
- A list of students on the right which is similar to other student list in the program
- A Size and Send window on the left
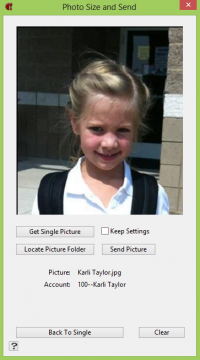
The easiest way to learn the features of Size and Send are to begin with a single photo. Click the GET SINGLE PHOTO button and find the photo you wish to work with. Open the photo and it will appear in the photo box. Photo Size and Send will adjust the photo to fit optimally using the largest parameter of either height or width. If your photo doesn't look just right, don’t worry, you are now ready to make adjustments.
Use the keyboard arrow keys to move the photo left and right, up and down. When you reach the border of the photo you will hear a beep and the arrows will no longer move the photo. Using the arrows keys, align the student photo in the photo box. To change the size of the photo and better crop the picture, hold down the shift key and use the arrow left and right arrow keys to make the photo larger or smaller. Release the shift key and continue with the arrow keys to get your photo exactly centered as you want it.
Select an account from the list to the right and double-click to assign the account to the picture. Once the Picture field and the Account field are assigned, hit the send button and the photo will automatically be sent to the proper account.
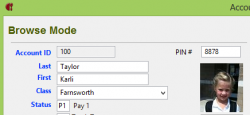
Check your work by going to the account manager and pulling up the account to check and see if the picture was assigned properly:

Once you are convinced things are working properly, try to use the semi automatic process. This is done by locating the picture folder using the LOCATE PICTURE FOLDER button. Once a folder is chosen a new box appears to the extreme right which shows the picture names in the selected folder. If the names of the photos are not such that make them easy to identify, click the get next picture button and the photo on the top of the list will be displayed. Preform the editing tasks and assign the correct account and you are ready to send the photo to the account where it belongs. Once a photo is assigned, it is removed from the list.
Double-Clicking photos on the list will remove them from the list but not from the folder…your originals will not be lost and the photo will not be available to assigned until you leave this session. If your photos are of similar size and orientation, check the KEEP SETTINGS check box and Photo Size and Send will attempt to pre-adjust your photo based on the last attempted settings. If after a while this feature seems to not be adjusting your photos with reason, causing to much readjusting, click the box off and begin from scratch. The Clear button will remove the picture and account assignments and you may select a new account if necessary. With practice you will become familiar with the adjustment procedures.

