The Account Manager
The ACCOUNT MANAGER is where all accounts are added or edited. Enter the ACCOUNT MANAGER by selecting the Account Management from the DATA ENTRY menu or by clicking on the ACCOUNT MANAGER button in the Command Center.
Before you actually begin entering account information, read through the rest of the information on this page.
Organizing Your Data
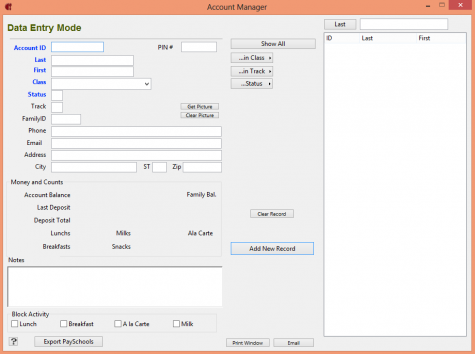
The empty scrolling list at the right of the window shows there are no accounts entered into the system. The easiest way to begin entering students into the system is to first organize your data.
School Lunch does allow for importing data from other sources. For more information on importing data, visit the importing data page.
The following information must be obtained for all students:
2. Student Name (last and first)
3. Class
4. Status Category (Free, Reduced, P1, P2, P3, A, AG, CG)
5. Track
6. Family ID Only needed if using family accounts. Not needed at this time. Family accounts can be built after all students are entered individually.
7. Student Phone Number (optional)
8. Email Address This is the mail address you would like to send messages to. Most likely this will be an email address for a parent. If you wish to enter both parents, simply separate the email addresses by a comma.
9. Student Address
10. Notes
12. PIN Number Only necessary if using WAV (Web Account Viewer).
An account needs to be created for all people in the school eating lunch (students, teachers, staff, etc.) They can be assigned to a class called Staff, or they can be given their assigned class like the students in the class in which they teach. It depends on whether you want them to print on class lists with their class or on a separate list with guests and staff.
Entering Data
Be consistent. Use Mixed-Case when entering information into the Account Manager. For example, enter the name Deborah as Deborah. Not DEBORAH, nor deborah. If you are not consistent, names may not appear on a list in the order that you expected as the computer will handle all report data in a case sensitive manner. Reports will also look much neater if you are consistent using upper and lower case.
When all the information is entered properly, press the RETURN key or click the SAVE NEW RECORD button. The information will be entered in the computer, the account number in the right hand corner of the window will increment by one, and the NAME and ID edit fields will be cleared for the next entry. If there is not valid information in all of the edit fields when pressing RETURN, you will see a warning message alerting you. Make sure there are no punctuation marks in any of the edit fields. Commas and other punctuation may cause erratic behavior.
Whenever there is a highlighted button, such as the ADD NEW RECORD button in the ACCOUNT MANAGEMENT window, pressing the RETURN key will execute the function of that button. To advance from one edit field to the next, use the TAB key.
If you press the RETURN key to save an account when the cursor is in the STATUS edit field, your information will be saved but you may not see the proper status information updated until after the save. Don’t worry, everything was saved correctly.
Making Changes
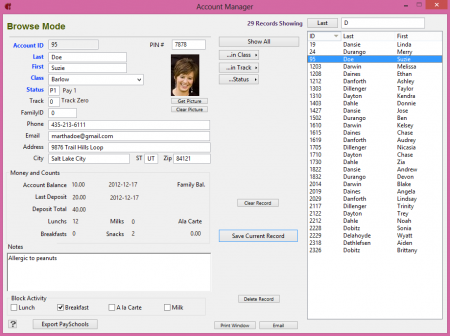
When the ACCOUNT MANAGER window is opened, the names and ID numbers of all the students entered into the system appear in the scrolling list at the right side of the window.

The scrolling list of account names can be sorted by clicking on the column header that you would like sorted. To sort by last name click on the LAST header button and to sort by ID click on the ID header Button.
Directly above the scrolling list, is a search field. To quickly find a student, you can start typing their name in the search field. To search by first name, make sure the small button to the left of the search field box says FIRST. To search by last, click the button to the left of the search field and it will change to LAST. Then start typing the student's name.
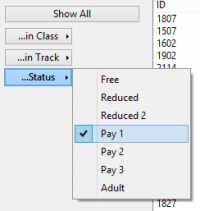
Directly to the left of the scrolling list, you'll notice 3 drop down menu buttons:  …In Class, …In Track, and …Status. This section allows you to fill the scrolling list with homogeneous groups of students such as all the students in a given class or students who have a 'P1' status, etc. This would be a helpful way to quickly see if you have the students in the Pay1 category that should be there. By looking over the list you might be able to find a misplaced student.
After making changes to an account, resave the information by clicking the SAVE CURRENT RECORD button. The SHOW ALL button restores all account names to the scrolling list after a particular search has been done. You may delete an account by clicking the DELETE button. The current account showing on the screen at that time will be deleted. If you choose to delete a student, the history for that student will be deleted. The student will be removed from a family, if they were associated with a family.
To view an account record, double click on the account owner’s name in the scrolling list. The fields on the left will fill in with the account information. All of the text fields can be modified. The section titled 'Money and Counts' cannot be modified here. See editing an account for more information on this.
Sending Emails & Printing Letters from the Account Manager
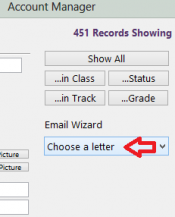
You may find that you need to send a email to only one or two students. Rather than go through the List Wizard to select these accounts, you can simply send an email or print a letter straight from that student's account. You can basically pull up any of your templates created in the Email Wizard and Letter Wizard, and send or print:


